The creation of our trebuchet is going really well. Charli and I have almost completed the main supports of the design and will soon be able to start working on the mechanics of the "arm." We are going to try and put a sling on the trebuchet, but if that doesn't work, we'll just make it a catapult.
Here is an image of our design, images of our work will be posted on a later date.
Design Futures
Monday, October 21, 2013
Wednesday, October 9, 2013
Trebuchet
This term we are making trebuchets!
Well... Catapults if we can't get sling to work, but I am determined to!
We will be trying to get our trebuchets to throw a golf ball the furthest and have suggested a battle between classes where we try to know down each others forts.
The one restriction that we have for this task is that the main structure of the trebuchet is allowed a maximum height of 550mm.
The unit sounds like a lot of fun, I have teamed up with Charli and today was our first day in the workshop.
We have glued and nailed together our base, and next lesson we will be starting on the main structure of the mechanism.
Sunday, May 5, 2013
Pro Desktop
Today we had a reintroduction to the CAD application Pro Desktop. It was a useful lesson as we haven't used the app in quite a while, and needed to be shown the ropes again. In this lesson, we created two different types of toy blocks with the letters A-F intruded into the sides.
Tuesday, March 5, 2013
Trees
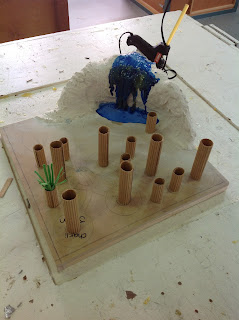
This lesson we created the trees that are going to house the people and the other miniature trees that are going to be spread around the place to add a more natural feel to the resort and make it seem less empty. The trees were made out of corrugated cardboard and were simply hot glued together.
We also created what will be the canopies of the trees, they were made out of cotton balls dipped in blue paint.
We also created what will be the canopies of the trees, they were made out of cotton balls dipped in blue paint.
Waterfall

On the first lesson, we routered out the lake/pool.
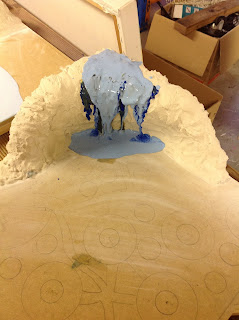
On the second lesson, we glued and nailed boards to the corner of the base and stapled chicken wire over the "cliff" and filled it up with news paper.
The third lesson was spent plastering the cliff with plaster of paris. It was quite fun to do, but a bit frustrating as one of the mixtures that we made was too watery and was drooping everywhere.
On the forth lesson, we started off by testing out how we could get the "waterfall effect" and ended up pouring blue paint on the cliff before covering it in hot glue and allowing it to drip into the lake. We then mixed PVA glue and the blue paint before pouring it in the pool and over the top of the original "waterfall" so that it would look like the water was actually coming from somewhere instead of magically appearing out of the middle of a rock.
Overall the waterfall ended up working out quite well, and we are quite pleased about the end result.
Monday, February 11, 2013
The Base and Idea for our resort.
So far in D&T we have created our base and come up with an idea for the theme of our resort.
We are basing our resort on the Star Wars Ewok Camp. There will be hydropower as there is going to be a waterfall next to the resort.
We are basing our resort on the Star Wars Ewok Camp. There will be hydropower as there is going to be a waterfall next to the resort.
Subscribe to:
Comments (Atom)


